Track Changes in Overleaf
Introduction
Track Changes is a premium feature. Overleaf premium features are available to participants in Overleaf Commons, members of group subscriptions, and owners of individual subscriptions. All collaborators invited to a project owned by an Overleaf account with this premium feature will be able to use Track Changes in that project. The Track Changes feature is not available through the Personal plan.
This article shows how to use Track Changes. You can use Track Changes to observe changes made by some, or all, co-authors or those you have invited to review, or proofread, your work. At a glance you’ll see any revisions which you can also comment upon to suggest further changes, ask for clarifications, request sources and much else besides.
You can leverage Track Changes and/or comments as a way to remind yourself of any follow-up work required based on your co-authors’ edits and contributions. Comments can be replied to, resolved (archived) and permanently deleted—see the article How to make comments in an Overleaf LaTeX project for some video clips showing how to use Overleaf’s commenting features.
Accessing Track Changes
Track Changes can be accessed by selecting the Review button which displays the Track Changes control panel:
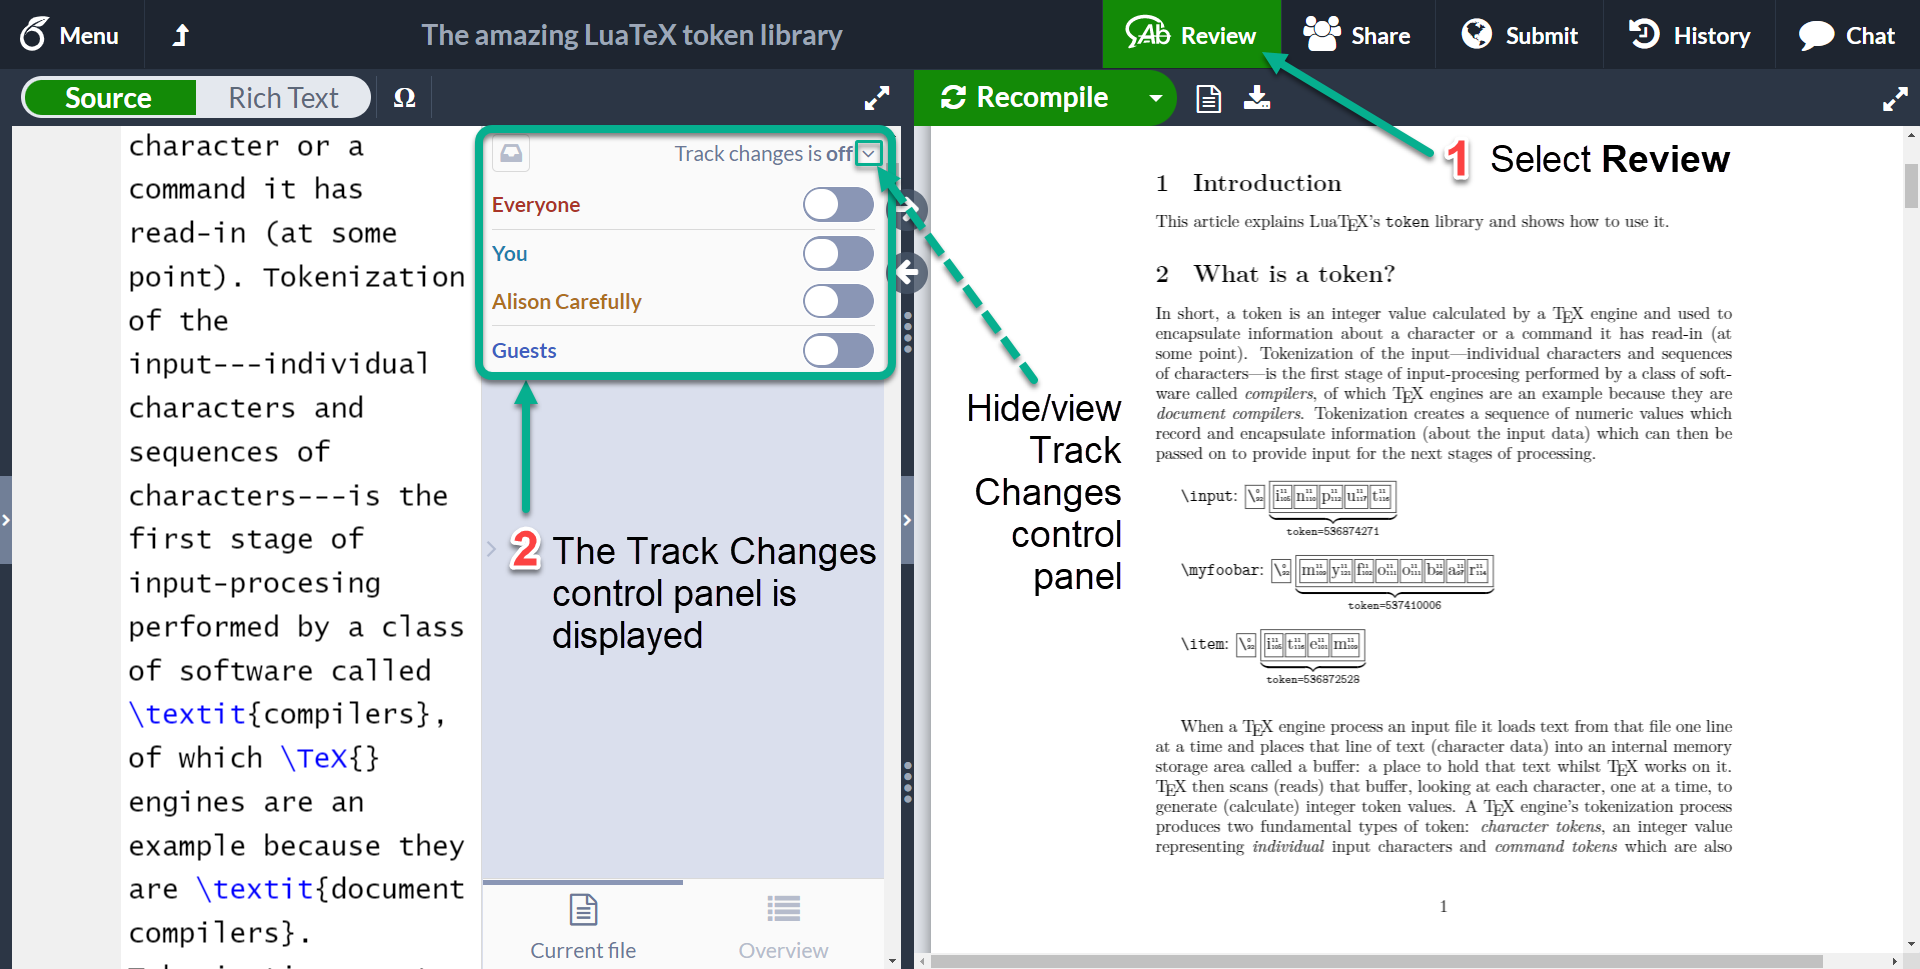
Track Changes control panel
This is a suite of toggle buttons which control whose changes will currently be tracked for this particular project. At any time you can set Track Changes on or off for:
- Everyone who has access to the project
- You: yourself
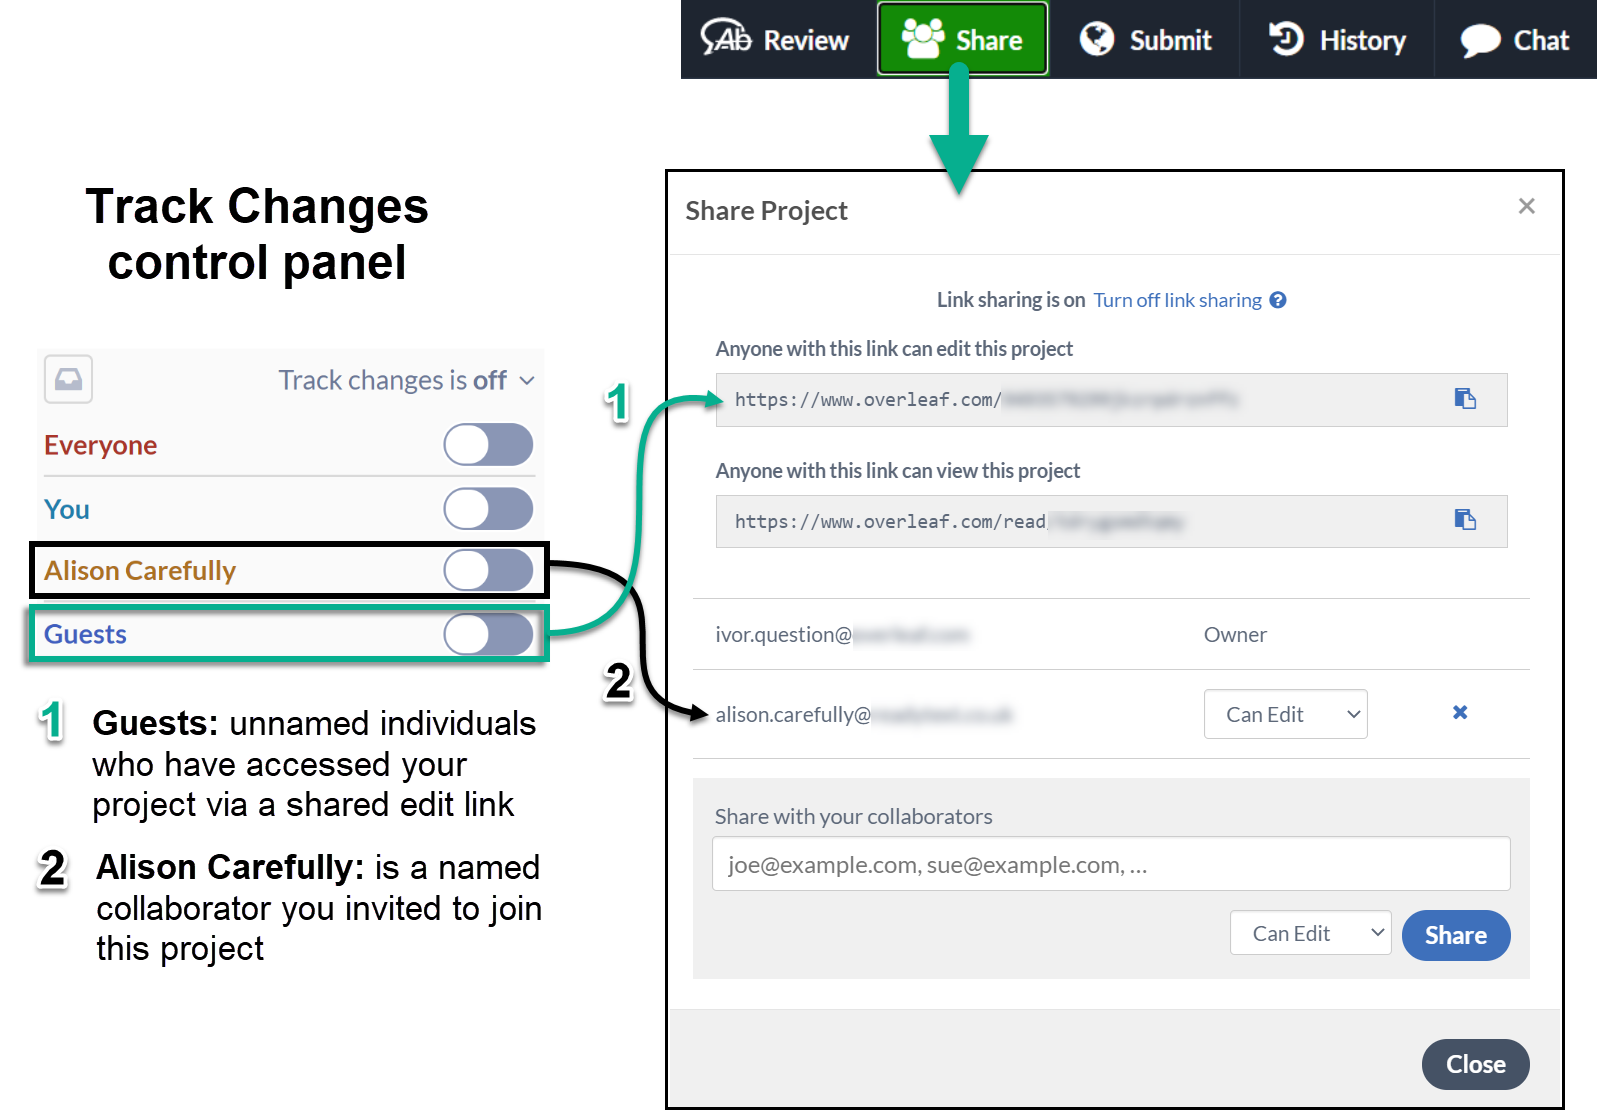
- Named collaborators: the names listed reflect those who the project owner has invited to join the project
- Guests: unnamed individuals using a shared edit link to open the project
The following annotated graphic explains the origin of Guests and Named collaborators:
Configuring whose changes will be tracked
The following 30 second video clip shows two collaborators using the Track Changes control panel to modify the settings for Track Changes.
Demonstrating track changes (video)
The following video clip (1 minute) demonstrates two collaborators using Track Changes to make updates to a project.
How to accept or reject all tracked changes
Follow these steps to accept (or reject) all tracked changes contained in a part, or whole, of your document.
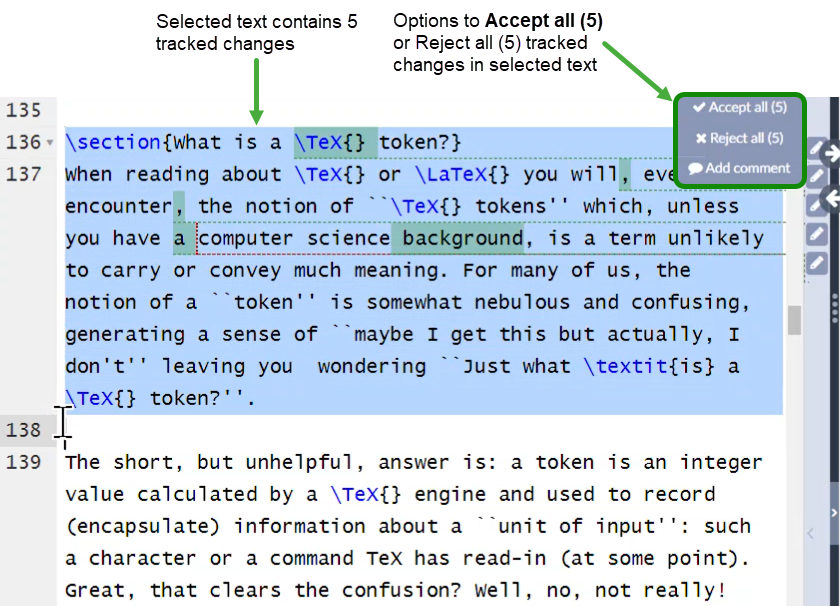
- Select the section of text containing the set of tracked changes you want to accept or reject. To accept or reject all tracked changes, select the entire document text using
ctrl+A(Windows) orcmd+A(Mac). - After the text is selected, the option to Accept all or Reject all changes will appear, as shown in the following example screenshot:
- Select Accept all or Reject all to display a pop-up window asking you to confirm or cancel your choice.
- Note: If you make a copy of your project, all tracked changes are automatically applied in the copied version.
Video demonstration
The following short video demonstrates how to accept (or reject) tracked changes in a section of a document or the entire document.
- Tip: After selecting your text, the Accept all or Reject all options may be obscured if you have the Review button selected (highlighted). As demonstrated in the following video clip, toggle the Review button to show the accept or reject options: